Basement Waterproofing Upgrades That Improve Energy Efficiency

A damp basement rarely stays a basement problem.
It shows up in higher heating bills, cold first floors, musty storage, peeling paint, and that stale feeling in the house that never quite goes away. Homeowners usually call for Basement Waterproofing because they want to stop leaks or prevent damage to finished spaces. What they often discover, sometimes after the first winter and sometimes after years of paying too much to heat and cool the house, is that moisture control and energy performance are tightly linked.
That connection is not theoretical. In real homes, wet materials lose insulating value, humid air takes more energy to condition, and uncontrolled air leaks around rim joists, penetrations, and foundation joints make HVAC systems work longer than they should. A basement that stays dry, sealed, and properly insulated can make the whole house feel steadier and cost less to run.
The key is choosing upgrades that solve both problems at once. Not every waterproofing product improves energy efficiency. Some stop liquid water but leave air leakage untouched. Others insulate but trap moisture in ways that create mold, odor, or hidden decay. The best results come from treating the basement as part of the building envelope, not just a place where water sometimes appears after a storm.
Why moisture control affects energy use
Water changes the way a basement behaves. Concrete and masonry naturally absorb and release moisture. When groundwater pressure pushes against foundation walls or water vapor moves through porous materials, the basement becomes cooler, damper, and harder to condition. Add a few air leaks and the result is a mechanical system fighting on two fronts.
First, damp air is expensive to manage. In summer, air conditioning does not just lower temperature. It also removes moisture, and that latent load can be substantial in a humid basement. In winter, moisture can make the basement feel colder than the thermostat suggests because humid, moving air strips heat from occupants and from surfaces.
Second, insulation performs poorly when it is wet or installed against chronically damp materials. Fiberglass batts placed in contact with a cool, humid basement wall are a classic example. They may look fine for a year or two, then slump, collect dust, and become a host for mold growth. Once that happens, the insulation is no longer doing its job, and the homeowner is left with both a moisture problem and an efficiency problem.
Third, water entry often follows the same pathways as air leakage. Cracks, utility penetrations, the cove joint where wall meets slab, and the rim joist area are common trouble spots. If bulk water or vapor can move through those areas, air often can too. That means every rain event and every cold snap exposes weaknesses in the basement envelope.
Start with diagnosis, not product shopping
Before discussing upgrades, it is worth saying something that contractors sometimes rush past: not every wet basement needs the same fix. A dehumidifier and wall coating may help one house and be almost useless in another. The age of the home, soil conditions, grading, foundation type, and how the basement is used all matter.
A 1920s stone foundation with seasonal seepage behaves differently from a poured concrete foundation built in the 1990s. A finished basement with carpet and drywall has lower tolerance for moisture than an unfinished utility space. A house on clay soil may deal with hydrostatic pressure after prolonged rain, while a house on sandy soil may have more manageable drainage patterns but serious air leakage at the rim joist.
In practice, good Basement Waterproofing begins with identifying the dominant moisture sources. Sometimes the answer is outside the house: clogged gutters, short downspouts, poor grading, settled walkways, or sprinkler overspray. Sometimes it is inside: humid air from unvented appliances, dryer leaks, plumbing seepage, or condensation on cold surfaces. Most basements have more than one issue.
Once the moisture map is clear, upgrades can be chosen in the right order. That order matters because insulating a wall before addressing water entry can lock in trouble.
Exterior drainage improvements do more than keep water out
The highest value waterproofing upgrades often happen outdoors. They are not glamorous, but they reduce the water load on the foundation and make every interior efficiency measure work better.
Proper grading should direct water away from the house, ideally with a noticeable slope for the first several feet. Downspouts should discharge far enough away that runoff does not simply cycle back toward the footing. In many homes, extending a downspout by 6 to 10 feet changes basement conditions more than any interior coating ever will. Gutters need enough capacity and enough maintenance to avoid overflowing at the exact points where water is already stressing the foundation.
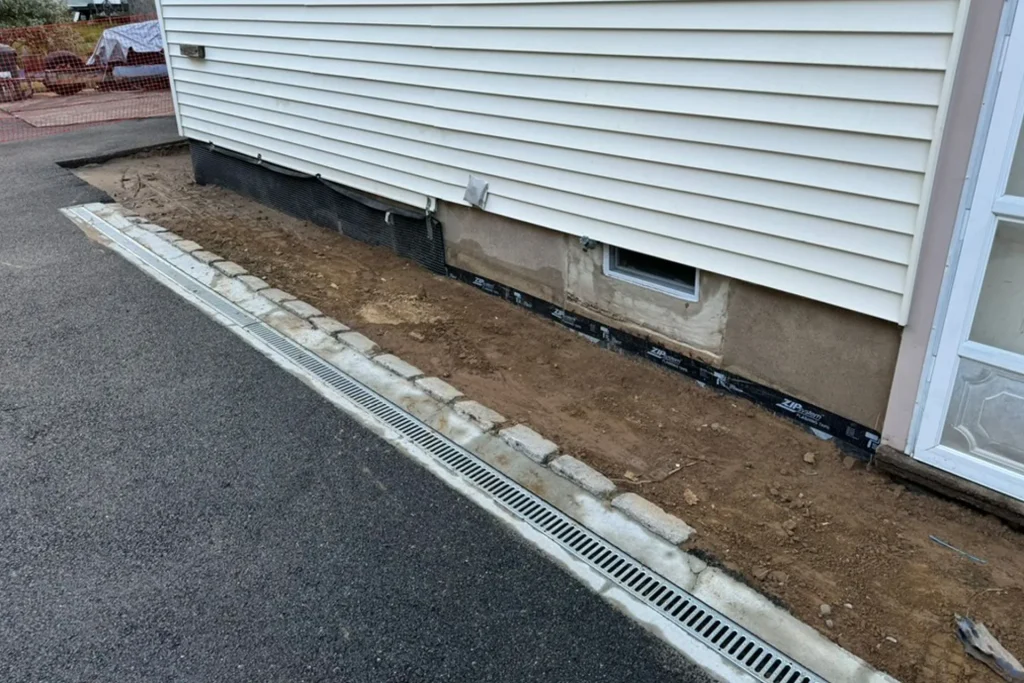
When exterior excavation is justified, foundation membrane systems paired with footing drains can be transformative. A good exterior membrane limits water contact with the wall, and a reliable drainage plane directs that water downward to a proper drain system. From an energy perspective, keeping the wall drier has two advantages. It reduces conductive heat loss through moisture-laden materials, and it lowers the interior humidity burden.
Exterior work can be expensive, especially on landscaped lots, row homes, or houses with decks and hardscape close to the wall. It is not always the first recommendation. But on severely wet foundations, it is usually the most complete solution because it reduces the source of the problem instead of merely managing the symptom after water has entered.
Interior drainage systems and sump upgrades
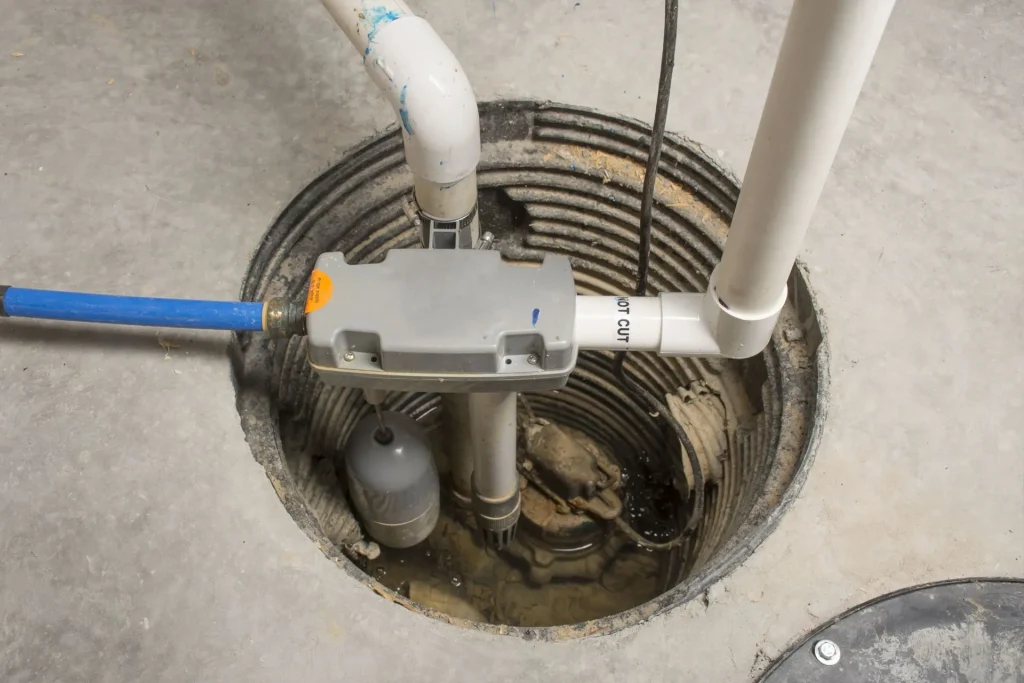
When exterior excavation is impractical, an interior drainage approach often makes sense. These systems typically intercept water at the perimeter and channel it to https://zanehrya347.meridiannest.com/posts/basement-waterproofing-for-homes-on-sloped-lots a sump pit, where it is pumped away from the house. They do not make the exterior soil dry, but they can keep the interior usable and protect finishes.
For energy efficiency, the benefit is indirect but real. A basement that no longer accumulates standing water or persistently damp slab edges is easier to dehumidify and safer to insulate. The HVAC system is not constantly dealing with damp materials and evaporating moisture. Floors above the basement often feel warmer because moisture-driven cooling at the foundation perimeter is reduced.
A sump system is only as good as its reliability. A high-efficiency pump with a sealed lid, proper discharge routing, and battery backup is worth the extra cost in homes where outages coincide with storms. Open sump pits are a common oversight. They release moisture into the basement and undercut some of the very gains the drainage system is meant to produce. Sealing the sump lid is a small detail with outsized value for humidity control.
Air sealing at the rim joist is one of the best returns available
If there is a single upgrade that repeatedly delivers both comfort and efficiency benefits in basements, it is careful air sealing at the rim joist. This area, where the framing sits on top of the foundation, is notorious for leakage. It is also a common spot for condensation because outdoor temperatures affect it quickly, and indoor air often reaches it through cracks and gaps.
Closed-cell spray foam is frequently used here because it air seals and insulates in one step while tolerating occasional moisture better than fibrous insulation. In many homes, 2 to 3 inches is enough to make a visible difference in winter comfort. The basement feels less drafty, floors above are less cold, and the furnace cycles a little less aggressively during cold weather.
There are trade-offs. Spray foam costs more than batt insulation and requires attention to fire protection requirements in some jurisdictions. It also needs a clean, dry enough substrate for proper adhesion. In older homes with irregular framing, however, it is often the most practical way to address dozens of small leakage paths that would be tedious to seal individually.
For homeowners who prefer not to use spray foam, rigid foam cut-and-cobble methods can work when executed carefully. The critical point is continuity. Small gaps around foam pieces can erase much of the intended benefit unless they are sealed thoroughly.
Foundation wall insulation must respect moisture reality
Insulating basement walls can substantially reduce heat loss, but the wrong assembly is one of the most common causes of basement odor, mold, and poor long-term performance.
The old approach, fiberglass batts in stud cavities against a basement wall, performs badly in many climates. The wall stays cold, interior moisture finds its way into the cavity, and organic materials sit where drying is limited. Over time, that assembly often fails both as moisture control and as thermal control.
Rigid foam board installed directly against the foundation wall is a better fit in many basements. Extruded polystyrene, expanded polystyrene, and polyisocyanurate each have strengths and limitations depending on climate, code requirements, and budget. What matters most is that the insulation layer stays in contact with the wall or close enough to limit air movement behind it, and that seams and edges are sealed to reduce air leakage. A framed wall can then be built inside that insulated layer if finishing is planned.
Closed-cell spray foam can also be effective on foundation walls, especially where surfaces are uneven or penetrations are numerous. It combines insulation, air sealing, and some vapor control. The price is higher, and installation quality matters a great deal, but in challenging spaces it can solve several problems at once.
One practical lesson from field experience: it is wise to leave homeowners realistic expectations about temperature. Insulating basement walls will usually make the basement less cold and less damp-feeling. It does not turn an unfinished basement into a main-floor living room overnight. The gains are real, but they depend on the rest of the envelope and on how the space is ventilated and conditioned.
The slab deserves more attention than it gets
People tend to focus on walls because that is where visible seepage occurs, yet the slab can be a major source of moisture and energy loss. A cool, uninsulated slab can drive discomfort and humidity, especially in finished basements.
If the slab is being replaced or the basement is part of a major renovation, adding a vapor barrier below the new slab and rigid insulation beneath or at the slab edge can pay off for years. Slab edge insulation is especially valuable because that perimeter is where heat loss is concentrated. Radiant floor systems, if planned, perform much better when the slab is thermally separated from the ground.
Retrofitting an existing slab is more constrained. You cannot easily add below-slab insulation without major work, but you can improve performance by controlling water entry, sealing cracks, and choosing floor finishes that tolerate some vapor movement. Dimple mats or subfloor panel systems can create a small capillary break and improve comfort underfoot, though they also raise finished floor height and may complicate stairs or door clearances.
Dehumidification is not a substitute for waterproofing, but it matters
A dehumidifier does not stop groundwater. It does not solve exterior drainage defects. Still, once bulk water problems are under control, dedicated dehumidification is often the piece that makes the basement finally feel finished.
Modern units are far more efficient than the noisy, undersized machines many homeowners remember. In a moderately damp basement, keeping relative humidity around 50 percent can protect stored items, reduce odor, and lower the chance of mold growth on cooler surfaces. Some systems can drain directly to the sump or a condensate line, which avoids the hassle of emptying buckets.
The energy angle is nuanced. Yes, a dehumidifier uses electricity. But in a damp basement, that electricity often replaces less efficient, less targeted moisture removal by the central air conditioner. It can also allow the upstairs thermostat to be set more reasonably because the house feels less clammy overall. In many homes, the comfort improvement is immediate.
Sizing matters. An undersized unit runs constantly and disappoints everyone. An oversized but efficient unit with a good drain setup often costs less to operate than homeowners expect, especially if it is not fighting active water intrusion.
Windows, penetrations, and other small leaks that add up
Basement windows are frequent weak points. Old steel or wood frames leak air, condense heavily, and sometimes admit water at the sill. Replacing them with well-flashed, energy-efficient units can improve comfort and reduce moisture risk, particularly in basements that are partly above grade. Window wells also need drainage and covers designed to keep out direct water without trapping debris and moisture.
Utility penetrations deserve the same scrutiny. Gas lines, hose bibs, cable entries, and electrical conduits are often sealed poorly or not at all. A handful of quarter-inch gaps may not look serious, but together they can create a meaningful draft path. This is especially noticeable in winter when stack effect pulls cold outdoor air into the basement and pushes warm indoor air out through upper leaks.
These are the kinds of details that separate a waterproofed basement from a high-performing basement. The dramatic leak may be gone, but if the penetrations still whistle on a January night, energy losses remain.
When finishing a basement, choose materials that can survive reality
A finished basement raises the stakes. Drywall, trim, flooring, and furniture are less forgiving than concrete and shelves. If you are investing in Basement Waterproofing and energy upgrades before finishing, material choices should reflect what basements are, not what main floors are.
That means avoiding materials that trap moisture against the wall or fail quickly after minor dampness. Cement board, foam-based wall systems, moisture-tolerant flooring, and thoughtful trim details all have a place. Carpet wall-to-wall over a basement slab still causes regret in a lot of houses. Even in dry basements, hard surface flooring with an appropriate underlayment is often the safer choice.
One project that stands out involved a basement that had been refinished twice in eight years. The first contractor addressed visible cracks and painted the walls. The second added fiberglass, drywall, and plush carpet because the basement had stayed dry for one summer. What neither project dealt with was rim joist leakage, poor grading at the back corner, and a slab that stayed cool enough to push humidity into the finished space. Once those issues were corrected, the third renovation lasted. The expensive part was not the waterproofing. It was paying for the first two failed finishes.
Upgrades that usually produce the best combined payoff
If a homeowner asks where the best value usually sits, the answer often includes a combination rather than a single product. In many houses, these are the improvements that deliver the strongest blend of dryness, comfort, and efficiency:
- Correct exterior drainage issues such as gutters, downspouts, and grading.
- Air seal and insulate the rim joist area.
- Add foundation wall insulation that is compatible with below-grade moisture conditions.
- Install or upgrade interior drainage and a sealed sump where water intrusion is recurring.
- Use dedicated dehumidification after the main moisture sources are controlled.
That sequence is not universal, but it reflects how basements actually improve. Stop the obvious water. Seal the leaky edges. Insulate with materials that will survive. Then manage the remaining humidity.
Costs, trade-offs, and what to prioritize
Prices vary widely by region, access, and severity of the problem, so any number given without context should be treated cautiously. A weekend spent fixing downspout discharge and regrading a problem corner may cost a few hundred dollars and solve a surprising amount. A perimeter interior drainage system with sump work may run into several thousand dollars. Full exterior excavation with membrane and drain installation can rise much higher, particularly when patios, driveways, or mature landscaping are involved. Spray foam and rigid foam insulation each add cost, but they also change comfort in ways homeowners notice every day.
The right priority depends on what the basement is doing now. If there is standing water, active seepage, or chronic dampness after rain, waterproofing comes first. If the basement is mostly dry but drafty and cold, air sealing and insulation may move to the front. If the basement already has decent moisture control but still feels clammy in summer, dehumidification may provide the fastest win.
There is also a durability argument that gets overlooked. Energy upgrades in a wet basement often fail early. Waterproofing upgrades in an unsealed basement may stop leaks but leave the house less comfortable than expected. When both are planned together, each dollar tends to work harder.
Signs the work was done well
The most reliable indicators are not marketing claims. They are changes in how the space behaves over time.
A properly upgraded basement usually smells neutral. Cardboard stored near the wall does not soften. Floors above feel less chilly in winter. The dehumidifier, if one is used, cycles normally instead of running nonstop. Paint and trim remain stable through seasonal swings. During heavy rain, the homeowner is not checking corners with a flashlight.
That is what successful Basement Waterproofing looks like when energy efficiency is part of the goal. Not a flashy feature, just a house that feels steadier, costs less to operate, and gives fewer surprises.
A basement should support the house, not fight it
Basements are often treated as second-class spaces, useful for storage, mechanical equipment, and little else. Yet they sit under the entire home, touching the soil, carrying structural loads, and shaping the comfort of every room above. When moisture is ignored, the basement drags down the house. When waterproofing and efficiency upgrades are handled together, the basement starts pulling its weight.
That shift is rarely the result of one miracle product. It comes from practical building science and careful sequencing. Keep bulk water away when you can. Manage the water you cannot keep away. Seal the air leaks. Insulate with materials suited to below-grade conditions. Control humidity so the work lasts.
Done right, those upgrades pay back in more than utility savings. They protect finishes, improve indoor air quality, reduce wear on equipment, and make the home feel more solid in every season. For many houses, the smartest path to better energy performance starts below your feet.
ARD Waterproofing
98 Smull Ave, West Caldwell, NJ 07006, United States
+1 917-691-8411
FAQ About Basement Waterproofing
Can you 100% Waterproof a Basement in West Caldwell?
A properly designed system can substantially reduce basement water intrusion, but no method can promise protection against every flood, equipment failure, or future change in site conditions. The first step is identifying whether moisture comes from surface runoff, groundwater, plumbing, or condensation. Solutions may include grading and gutter improvements, drainage, foundation repairs, and a sump system. Review the specific coverage and exclusions of any written warranty.
How much does it cost to professionally waterproof a basement in NJ?
There is no single price that fits every basement. Cost depends on the cause of the leak, the area needing work, access, excavation requirements, drainage design, sump equipment, and restoration of disturbed finishes or landscaping. Request an on-site assessment and an itemized written estimate that explains the scope, exclusions, and maintenance requirements before comparing proposals.
How long does foundation waterproofing last in West Caldwell, NJ?
Service life varies with the waterproofing materials, installation quality, soil and water conditions, and maintenance. Drainage components and pumps may require servicing or replacement even when other parts of the system remain functional. Keep gutters, drainage outlets, and sump equipment maintained, and have recurring leaks or changes in foundation condition assessed. Ask for product-specific expectations and written warranty terms rather than relying on one lifespan for the entire system.